Tri-Clamp Sizing Made Easy: A Comprehensive Guide
Choosing the right tri-clamp size ensures a secure and leak-free connection in your brewery. Tri-clamps, also known as tri-clover clamps, are essential components in brewing and other sanitary applications. They connect various pieces of equipment, such as pipes, valves, and tanks, while maintaining a sanitary and tight seal. However, figuring out the correct tri-clamp size can be a bit perplexing, especially for those new to the brewing industry. In this comprehensive guide, we will delve into the world of tri-clamps, their history, terminology, and the essential tips you need to know to select the right size and ensure a proper connection.
A Brief History of Tri-Clamps
The sanitary connection we know today as “tri-clamp” has a rich history. Originally trademarked as “Tri-Clover” by Alfa-Laval, a sanitary equipment manufacturer, it became synonymous with high-quality connections in the industry. Later, Ladish Co. rebranded it as “Tri-Clamp,” a name that has become widely recognized. Tri-clamp connections were eventually standardized by the DIN-32676 specification for sizes ranging from 1/4 inch to 6 inches, making them a global standard for sanitary industries.
Terminology
Understanding key terminology associated with tri-clamps is essential for making informed choices:
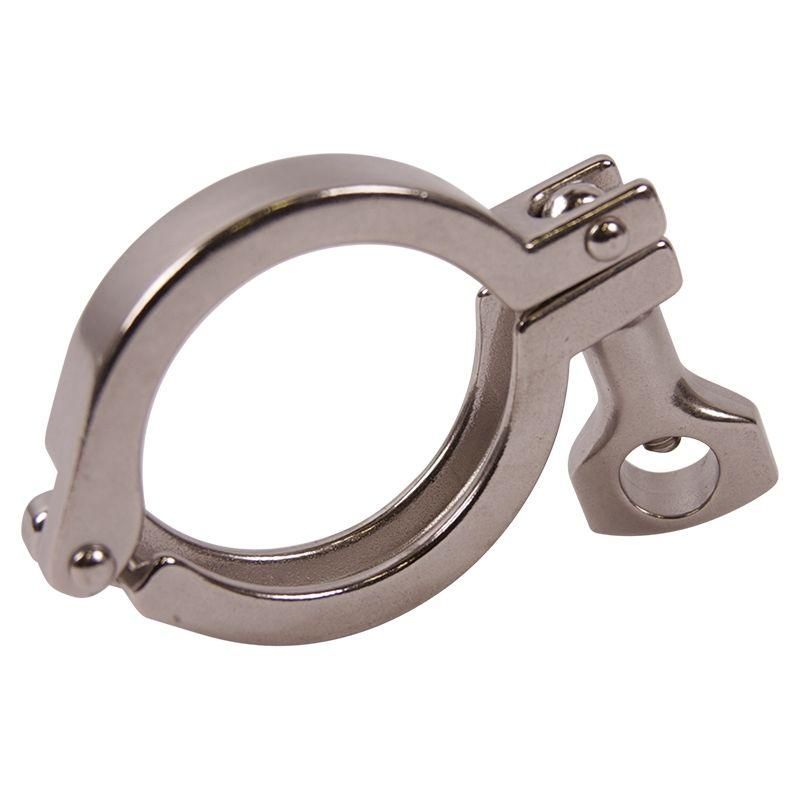
- Flange or Ferrule: This refers to the circular end of a tri-clamp pipe or fitting with a groove in the face designed to hold a gasket.
- Gasket: A gasket is a rubber component that fits between two flanges, forming an airtight seal when clamped.
- Clamp: The clamp joins two tri-clamp flanges and can be tightened using either a thumbscrew or bolts.
Why Use Tri-Clamps?
- Tri-clamps offer advantages that make them the preferred choice in many industries, including brewing:
- Easy to Clean: Tri-clamps are easily disassembled and reassembled for cleaning. They do not have tight spaces that are challenging to clean thoroughly.
- Sanitary Connection: Tri-clamp connections leave no room for contaminants or bacteria to grow, making them ideal for sanitary applications.
- Industry Standard: Tri-clamp is a standard fitting used in various sanitary industries, including food and beverage, pharmaceuticals, and biotech
Flange Identification
Identifying and measuring tri-clamp flanges is essential for selecting the correct size.
- Measurement: Tri-clamp sizes are determined by the outside diameter (OD) of the tubing or pipe, not the outside diameter of the flange.
- Flange Diameter: Interestingly, some tri-clamp flanges share the same diameter, such as 1/4″ and 3/4″, or 1″ and 1.5″. This compatibility allows flanges with the same diameter to use the same clamps.
Understanding Tri-Clamp Sizing
Tri-clamp sizes are determined by the outer diameter (OD) of the tubing or pipe to which they will be connected. These sizes are typically expressed in inches, with common sizes ranging from 1/2″ to 12″ or more, catering to a wide variety of applications. It is important to note that the OD of the tubing or pipe should match the tri-clamp size for a proper fit.
Why Tri-Clamp Sizing Matters
Choosing the correct tri-clamp size is crucial for several reasons:
- Seal Integrity: A mismatch in sizes can result in leaks, compromising the integrity of your connections and potentially leading to contamination or product loss.
- Hygiene: Maintaining a hygienic environment is critical in sanitary applications like brewing. A proper tri-clamp fit ensures no crevices or gaps where bacteria or other contaminants can accumulate.
- Efficiency: A snug fit between the tri-clamp and tubing or pipe ensures optimal flow rates and minimizes turbulence, improving the efficiency of your processes.
Using the Glacier Tanks Sizing Guide
Glacier Tanks offers a helpful sizing guide to simplify selecting the right tri-clamp size for your needs. https://www.glaciertanks.com/sizing.html
Here is how to use it effectively:
- Measure the Outer Diameter (OD): Start by measuring the outer diameter of the tubing or pipe that you will be connecting with the tri-clamp. Use a caliper or a reliable measuring tool to obtain an accurate measurement.
- Refer to the Sizing Guide: Visit the Glacier Tanks website and access their tri-clamp sizing guide. This guide is often presented as a chart or table, making it easy to cross-reference your measured OD with the corresponding tri-clamp size.
- Select the Correct Size: Once you have identified the tri-clamp size that matches your measured OD, you are ready to make your selection. Glacier Tanks typically offers a range of tri-clamp products in assorted sizes, ensuring you can find the perfect fit for your application.
Common Tri-Clamp Sizes and Applications
While the choice of tri-clamp size depends on your specific equipment and needs, here are some common sizes and their typical applications:
- 1/2″ and 3/4″ Tri-Clamps: These smaller sizes are often used to connect fittings, valves, and smaller tubing in homebrew setups or applications where space is limited.
- 1″ and 1.5″ Tri-Clamps: These sizes are versatile and suitable for various connections, including pumps, valves, and smaller tanks.
- 2″ and 2.5″ Tri-Clamps: These mid-sized clamps are commonly used for connecting larger pipes and equipment in commercial breweries and industrial settings.
- 3″ and Larger Tri-Clamps: These larger sizes are typically found in industrial-scale breweries and facilities with substantial tubing and tanks.
Tips for a Secure Connection
To ensure a secure and leak-free connection when using tri-clamps, consider the following tips:
- Proper Gasket Selection: Use the appropriate gasket material for your application, whether EPDM, silicone, or another suitable material. Make sure the gasket size matches your tri-clamp and the OD of your tubing or pipe.
- Tighten Evenly: When securing the tri-clamp, tighten the bolts or clamp evenly in a crisscross pattern to distribute the pressure uniformly and create a tight seal.
- Check for Wear: Regularly inspect your tri-clamps and gaskets for signs of wear, damage, or deterioration. Replace any components that show wear and tear to maintain a dependable seal.
- Maintain Cleanliness: Keep all components clean and debris-free to ensure a sanitary connection. Proper cleaning and sanitation practices are essential in brewing and other food-related industries.
Selecting the right tri-clamp size is fundamental in achieving secure and leak-free connections in your brewery or sanitary application. By measuring the outer diameter of your tubing or pipe and referring to the Glacier Tanks sizing guide, you can confidently choose the correct tri-clamp size for your needs. Remember that a proper fit ensures seal integrity and contributes to your processes’ overall efficiency and hygiene. So, whether you are a seasoned brewmaster or just starting your journey in the world of brewing, mastering tri-clamp sizing is an essential skill that will serve you well in your pursuit of crafting exceptional brews.
Cheers to leak-free connections and successful brewing!